
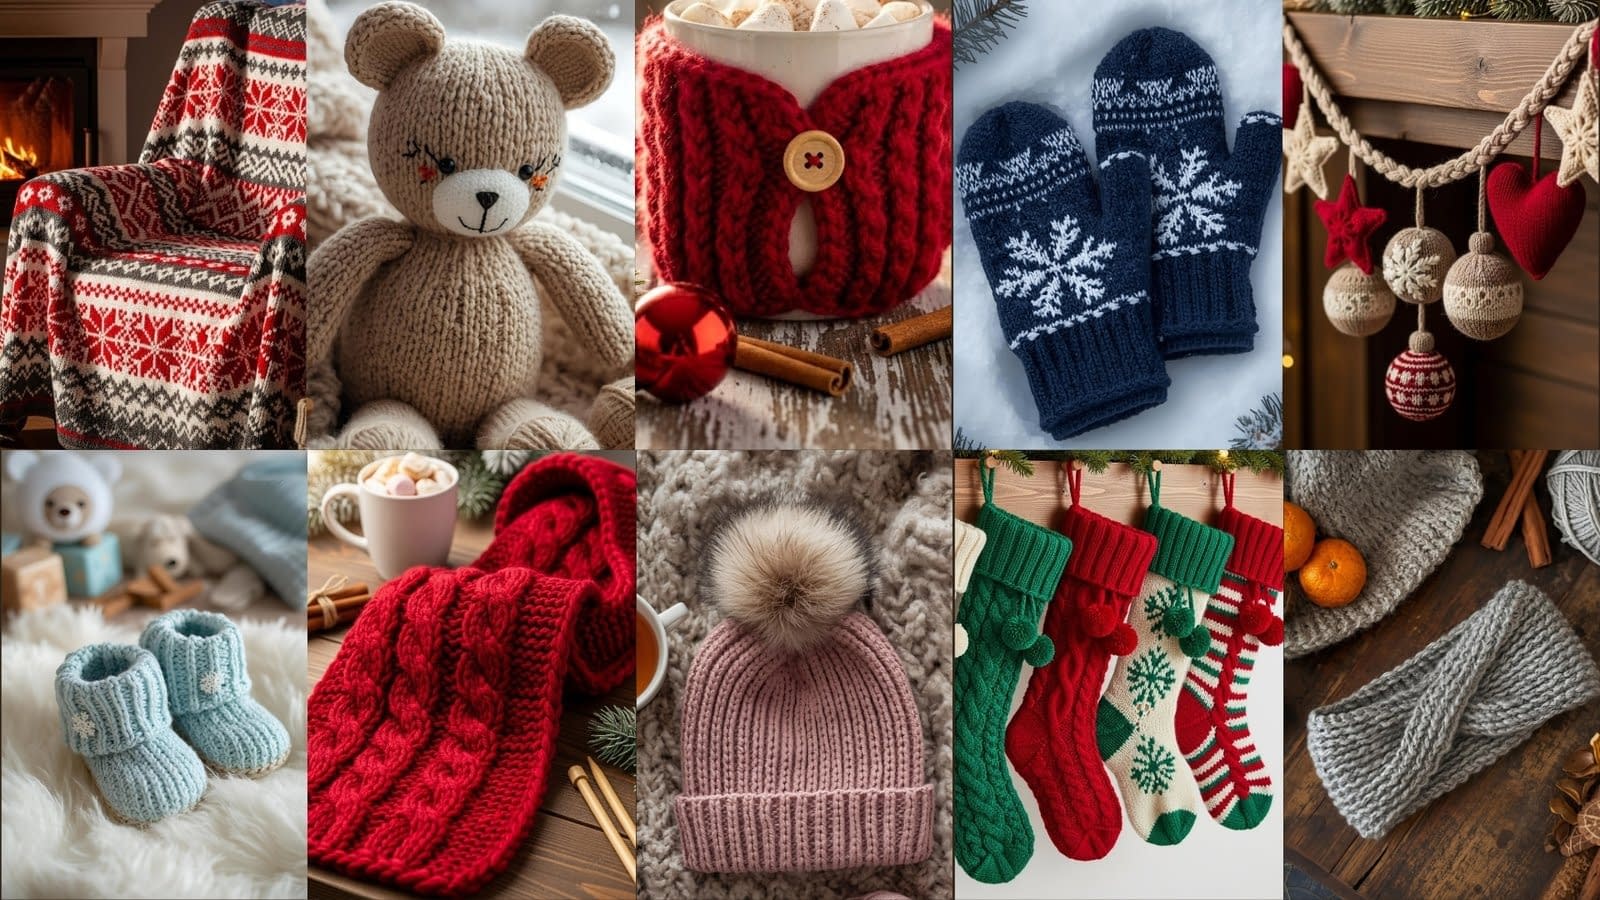
Winter is the season of warmth, comfort, and handmade gifts that carry a personal touch. When the temperature drops and the world feels quieter, knitting becomes more than just a craft. It becomes a way to express care, to slow down, and to create something meaningful with your hands. Whether you want to surprise loved ones with thoughtful winter accessories or build a collection of handmade décor for your own home, this guide on “10 Cozy Winter Knitting Patterns and Craft Ideas for Handmade Gifts” will walk you through inspiring, texture-rich, highly detailed projects that bring the beauty of winter to life.
This post is built entirely around the ten photorealistic prompts you provided earlier, ensuring that every pattern matches the atmosphere, texture, color palette, and cozy aesthetic of those scenes. Each pattern comes with step-by-step, long-form instructions written in full stitch names for clarity. These guides are intentionally beginner-friendly yet detailed enough for intermediate knitters who love precision, clean finishes, and beautifully defined textures.
Below, you will find the first three patterns: the chunky cable-knit scarf, the snowflake mittens, and the ribbed beanie with a faux-fur pom-pom. Each is designed to be giftable, functional, and visually stunning. The full post will continue in additional parts once you approve.
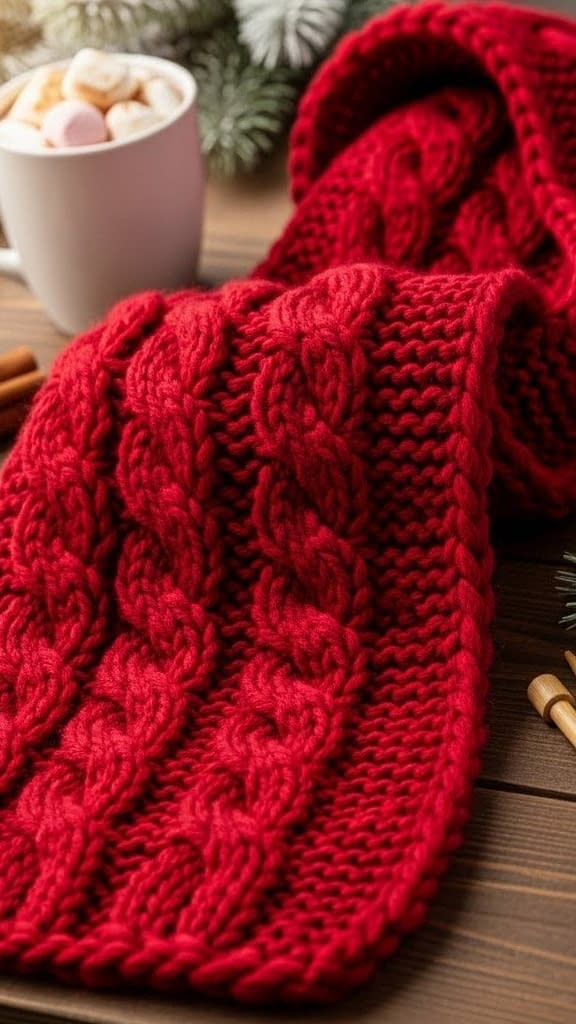
Chunky Cable-Knit Scarf
Skill level: Beginner to intermediate
Finished size: Approximately 70 inches long by 8 inches wide (adjustable)
Materials:
• Super bulky weight yarn in cream
• Knitting needles size 9 mm
• Cable needle
• Scissors
• Yarn needle for finishing
This scarf is inspired by the cozy, rustic scene of a thick cable-knit textile draped across a wooden table with soft winter lighting. The cables are deep and bold, giving the scarf a luxurious texture that makes it gift-ready for anyone who appreciates warmth and style.
Description and Notes
This scarf uses classic six-stitch cables, framed by ribbed edges for structure. Because the yarn is super bulky, the texture becomes beautifully pronounced, closely matching the photorealistic prompt. Even if you have never knit cables before, this step-by-step guide will help you create clean, even twists that look professional.
Pattern Instructions
Casting On
Cast on 22 stitches using the long-tail cast-on method. This stitch count includes edge stitches, two sets of cables, and separating knit stitches.
Your stitch structure will be:
• 3 knit stitches (edge rib)
• 6-stitch cable
• 4 knit stitches (center spacing)
• 6-stitch cable
• 3 knit stitches (edge rib)
Row Structure
You will repeat a four-row pattern sequence throughout the entire scarf. The cables will twist every eighth row, allowing the fabric to remain stretchy yet defined.
Row 1 (Right Side)
Knit all stitches. This establishes the top border and keeps the edges neat.
Row 2 (Wrong Side)
Purl all stitches. This maintains the clean underside characteristic of cable textures.
Row 3 (Right Side)
Knit 3 stitches to form the left edge.
Slip next 3 stitches onto a cable needle and hold them at the back of your work.
Knit the next 3 stitches from your left needle.
Knit the 3 stitches from the cable needle.
Knit the next 4 stitches in the center panel.
Slip the next 3 stitches onto a cable needle and hold them at the front of your work.
Knit the next 3 stitches from your left needle.
Knit the 3 stitches from the cable needle.
Knit 3 stitches for the right edge.
This creates your first set of cable twists.
Row 4
Purl all stitches.
Continuing the Pattern
Repeat Rows 1 through 4 for seven total pattern repeats, but only twist cables every eighth row. This means:
• Rows 1 through 7: follow the row sequence, but work the cable as straight knit stitches without twisting.
• Row 8: perform the cable twist (the same as Row 3).
Continue until your scarf measures approximately 70 inches or your preferred length.
Finishing the Scarf
Once you reach the final length, bind off loosely using the knitwise bind-off method.
Weave in all loose ends securely.
Gently block the scarf by laying it flat and shaping the cables so they sit evenly.
The finished result is a warm, chunky scarf with deep textures that feel luxurious and inviting, perfect for winter gifting.
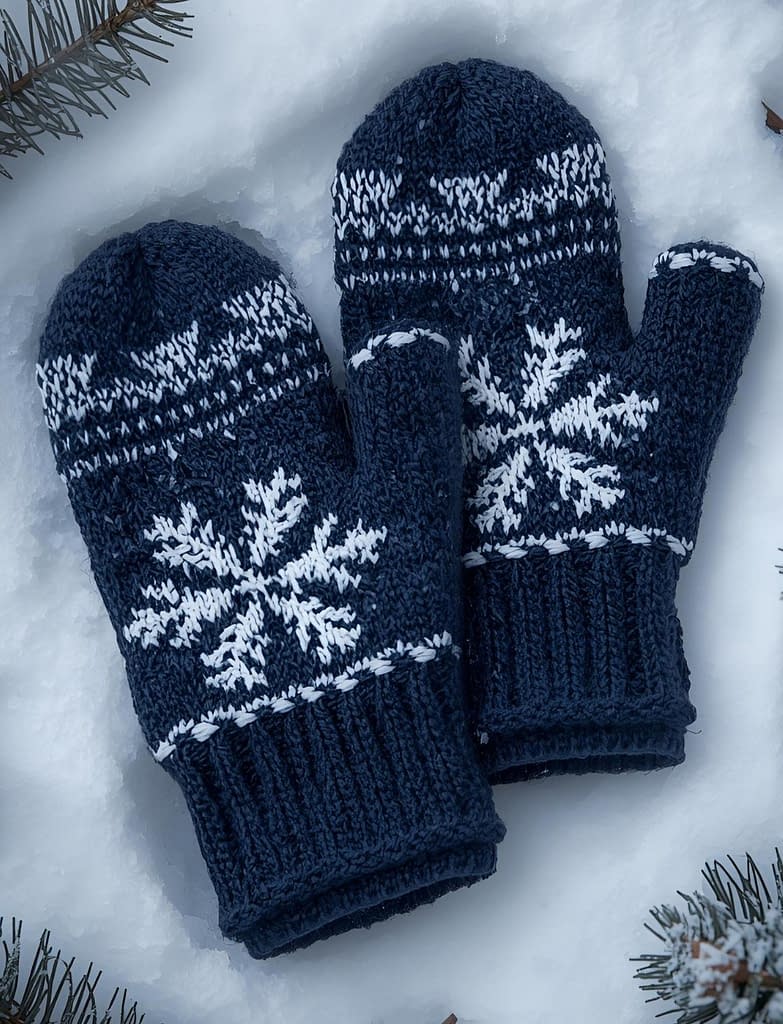
Hand-Knit Snowflake Mittens
Skill level: Intermediate
Finished size: Fits most adult hands
Materials:
• Worsted weight yarn in navy and white
• 4.5 mm double-pointed needles or circular needles for magic loop
• Stitch markers
• Yarn needle
Inspired by the crisp winter scene of navy and white snowflake-pattern mittens resting on fresh snow, this pattern combines traditional stranded colorwork with structured shaping for a perfect winter accessory.
Description and Notes
These mittens feature a classic snowflake motif worked in stranded knitting. Although colorwork can feel intimidating, the instructions below walk through each step slowly and clearly. The mittens include a ribbed cuff, a comfortable hand section, and a rounded top that keeps hands warm during cold outdoor days.
Pattern Instructions
Cuff
Cast on 32 stitches in navy yarn.
Join to knit in the round, being careful not to twist the stitches.
Place a stitch marker at the beginning of the round.
Work 18 rounds of knit 2, purl 2 ribbing.
This creates a stretchy cuff that holds heat.
Hand Section
Switch to stockinette stitch by knitting all stitches in each round.
Work 6 rounds in navy yarn to create a solid foundation before beginning the snowflake design.
Snowflake Pattern Setup
The snowflake will be worked over 32 stitches. You will alternate colors following a chart-like sequence described in detailed written form.
Round A: Knit 3 stitches in navy, knit 1 stitch in white. Repeat this sequence until the end of the round.
Round B: Knit 2 stitches in navy, knit 2 stitches in white. Repeat until round ends.
Round C: Knit 1 stitch in navy, knit 3 stitches in white. Repeat.
Round D: Knit 4 stitches in white, knit 4 stitches in navy. Repeat.
Round E: Reverse Round C.
Round F: Reverse Round B.
Round G: Reverse Round A.
This creates a symmetrical snowflake design across the mitten.
Thumb Gusset
Round 1: Knit 15 stitches, place a marker, increase one stitch by knitting into the front and back of next stitch, knit 1 stitch, increase again, place a marker, knit to end.
Continue increasing between markers every other round until you have 13 stitches in the thumb panel.
Place thumb stitches on a holder and continue knitting the hand until the mitten reaches the top of your pinky finger.
Shaping the Top
Round 1: Knit 2 stitches together every 6 stitches.
Round 2: Knit all stitches.
Round 3: Knit 2 stitches together every 5 stitches.
Continue decreasing in this pattern until only 8 stitches remain.
Cut yarn, thread through remaining stitches, pull tight, and secure.
Thumb
Pick up the 13 stitches from the holder.
Knit in navy for 10 rounds.
Decrease by knitting 2 stitches together every alternate stitch until 4 remain.
Close as before.
Finishing
Weave in ends.
Steam lightly to smooth colorwork and define stitches.
These mittens are deeply textured, warm, and perfect for gifting on snowy winter mornings.
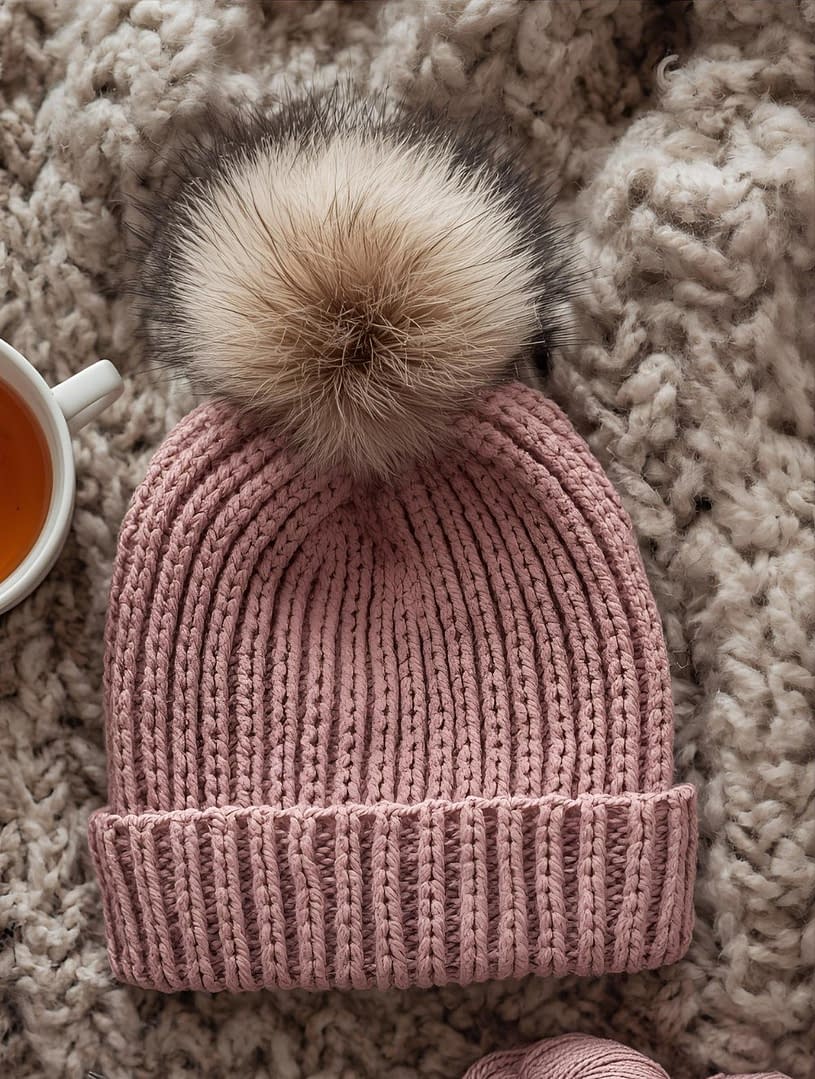
Cozy Ribbed Beanie With Faux Fur Pom-Pom
Skill level: Beginner
Finished size: Fits most teens and adults
Materials:
• Bulky weight yarn in muted rose pink
• 6.5 mm circular needles
• Faux fur pom-pom
• Yarn needle
This beanie mirrors the softness and serene aesthetic of the image prompt: a ribbed pink hat resting on a chunky wool blanket with a warm crafting ambiance. The ribbing makes the hat stretchy and comfortable.
Description and Notes
The beanie uses a simple rib pattern that produces a plush fabric with excellent elasticity. The faux fur pom-pom adds a stylish finishing touch. This is a great pattern for beginners because it requires only basic stitches.
Pattern Instructions
Band
Cast on 48 stitches using the long-tail cast-on method.
Join in the round and place a marker.
Work knit 1, purl 1 ribbing for 28 rounds or until the band measures about 8 inches.
This makes the beanie slouchy and warm.
Crown Shaping
Round 1: Knit 6 stitches, knit 2 stitches together. Repeat around.
Round 2: Knit all stitches.
Round 3: Knit 5 stitches, knit 2 stitches together.
Round 4: Knit all stitches.
Continue decreasing in this manner until 8 stitches remain.
Cut yarn, thread onto needle, weave through stitches, and tighten.
Attach the faux fur pom-pom to the top using strong thread or yarn.
Finishing
Weave in all ends neatly.
Lightly shape the hat by hand to enhance rib texture.
The resulting beanie is soft, stretchy, and perfect for cold winter days.
Knitted Hot Cocoa Mug Cozy
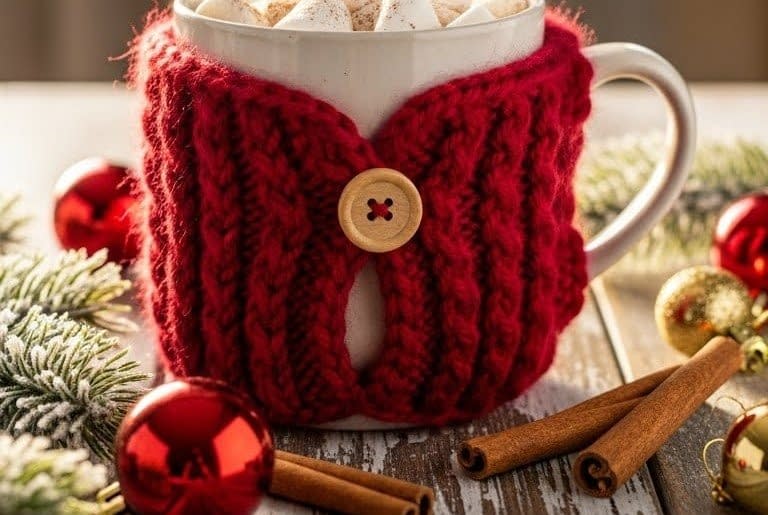
A knitted hot cocoa mug cozy is one of the most charming and practical winter gifts. It transforms any simple ceramic mug into a festive, warm, and personalized winter accessory. This design stays true to the visual atmosphere of the prompt: a warm red knitted cozy wrapped around a mug filled with hot cocoa and marshmallows, surrounded by soft holiday décor and golden morning light. This pattern is beginner-friendly yet provides enough detail to teach important skills such as knitting flat fabric, shaping, adding simple cables, and sewing seams.
Skill Level
Beginner to Intermediate (simple cables + seaming)
Finished Size
Designed to fit most standard mugs that measure approximately 10–12 ounces. The final fabric stretches, allowing it to adapt to slightly smaller or larger mugs.
Materials
• Worsted weight yarn in warm red
• Pair of straight knitting needles, size 4.5 mm
• Yarn needle
• Scissors
• Optional button for closure
• Optional cable needle
Notes
The cozy is worked flat as a rectangular panel with small cable details running vertically. After knitting, the panel is wrapped around the mug and seamed, leaving an opening for the handle if desired. You may choose to add a button closure instead of a full seam to create an adjustable fit.
Instructions
Step 1: Casting On
Begin by casting on enough stitches to create a panel approximately 3.5 inches tall. Most standard mugs work well with a cast-on of 16 to 20 stitches depending on your knitting tension. Aim for a firm yet flexible fabric that hugs the mug tightly.
Step 2: Establishing the Ribbed Edge
Work the first six rows in a knit one, purl one ribbing pattern. This creates a neat top and bottom edge that prevents curling and enhances the coziness of the finished project.
Step 3: Working the Body with Simple Cable Details
Once you complete the ribbing, transition into the main body pattern.
For a classic cable panel effect:
• Keep two stitches of ribbing on each side for structure.
• In the center, work a simple four-stitch cable every sixth row.
• To form the cable, place two stitches onto a cable needle, hold the cable needle in front of the work, knit the next two stitches from the left needle, then knit the two stitches from the cable needle.
• Continue working in stockinette stitch between cable rows.
Repeat this sequence until the panel is long enough to wrap around the mug with a snug fit. Stretch the panel slightly as you measure, because knitted fabric naturally expands around cylindrical shapes.
Step 4: Finishing the Panel
Once the length is sufficient, finish the last six rows again in knit one, purl one ribbing. This matches the top edge and gives the cozy a clean look.
Bind off loosely to maintain stretch.
Step 5: Seaming or Adding a Button
Place the finished panel around your mug. You may fully seam the edges together using a whip stitch, leaving an opening for the mug handle. Alternatively, sew a button to one corner of the panel and create a small yarn loop on the opposite side for an adjustable closure.
Step 6: Optional Embellishments
You may add small holiday details such as embroidered stars, snowflake stitches, or tiny beads. Keep embellishments minimal so the cozy stays functional.
Variations
• Replace the cable with seed stitch for a textured look.
• Use a color-changing yarn for festive stripes.
• Attach a tiny knitted snowflake charm for extra personalization.
This cozy is functional, festive, and incredibly charming, making it a perfect stocking stuffer, teacher gift, or winter craft fair item.
Winter-Themed Baby Booties
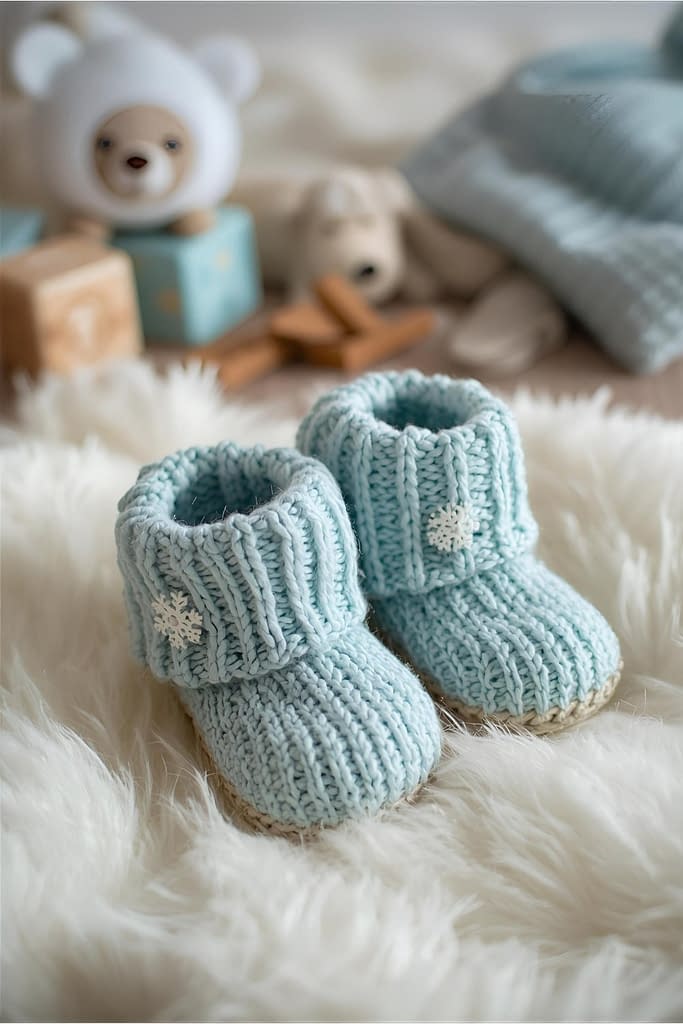
Baby booties are one of the most heartwarming handmade gifts, especially when knitted in soft pastel blue with delicate snowflake buttons as described in the prompt. These booties rest gently on a faux-fur blanket under calm winter light, creating a dreamy and sentimental atmosphere. This pattern is designed to be approachable while teaching common shaping techniques such as creating the toe box, forming the heel, and adding decorative elements.
Skill Level
Beginner to Intermediate (basic shaping skills)
Finished Size
Newborn to 3 months; easily adjustable by altering needle size or yarn weight.
Materials
• Soft worsted or lightweight worsted yarn in pastel blue
• Pair of straight knitting needles, size 4 mm
• Yarn needle
• Scissors
• Two snowflake buttons (for decoration)
Notes
The booties are constructed flat, beginning at the sole, then shaped into the toe and ankle before being seamed. This method is ideal for beginners who want to avoid working in the round.
Instructions
Step 1: Casting On for the Sole
Cast on 28 stitches for a newborn size. For larger sizes, add two extra stitches on each side. Ensure your casting-on tension is consistent so the sole edge remains smooth.
Step 2: Forming the Bootie Sole
Work in garter stitch (knit every row) for approximately ten rows. This produces a flat and cushioned sole.
Step 3: Creating the Toe Box
Switch to stockinette stitch by knitting one row and purling the next for eight rows. This creates flexibility for the toe area.
To shape the toe:
• Knit two stitches together at each end of every right-side row until you reduce the stitch count by approximately eight stitches.
• Continue working in stockinette stitch without decreases for four more rows.
This gradually narrows the fabric to hug the baby’s toes gently.
Step 4: Forming the Instep
To create the top part of the bootie:
• Work the center group of stitches while placing the side stitches on stitch holders or simply ignoring them temporarily.
• Knit the center eight to twelve stitches in stockinette stitch for six to eight rows, creating a raised top section.
Step 5: Rejoining the Bootie
Reintroduce the side stitches and knit across all stitches for another eight rows in stockinette stitch. This brings the entire bootie together into a soft, sock-like shape.
Step 6: Creating the Ankle Cuff
Switch to ribbing by working knit one, purl one across the row. Continue this ribbing for ten to twelve rows so that the cuff folds comfortably and stays in place on the baby’s ankle.
Bind off loosely for stretch.
Step 7: Sewing and Finishing
Fold the bootie in half with the right sides together. Sew the sole seam from the toe to the heel. Then sew the back seam along the cuff.
Turn the bootie right-side out.
Sew the snowflake buttons onto the outer side of each bootie for a winter-themed decorative touch.
Variations
• Add a small pom-pom at the back of the ankle for a playful look.
• Use white embroidery thread to stitch tiny snowflakes onto the toe.
• Make striped versions with alternating winter colors.
These winter baby booties are soft, sentimental, and highly giftable, perfect for baby showers, winter newborn photography, and treasured keepsakes.
Nordic-Style Knitted Blanket
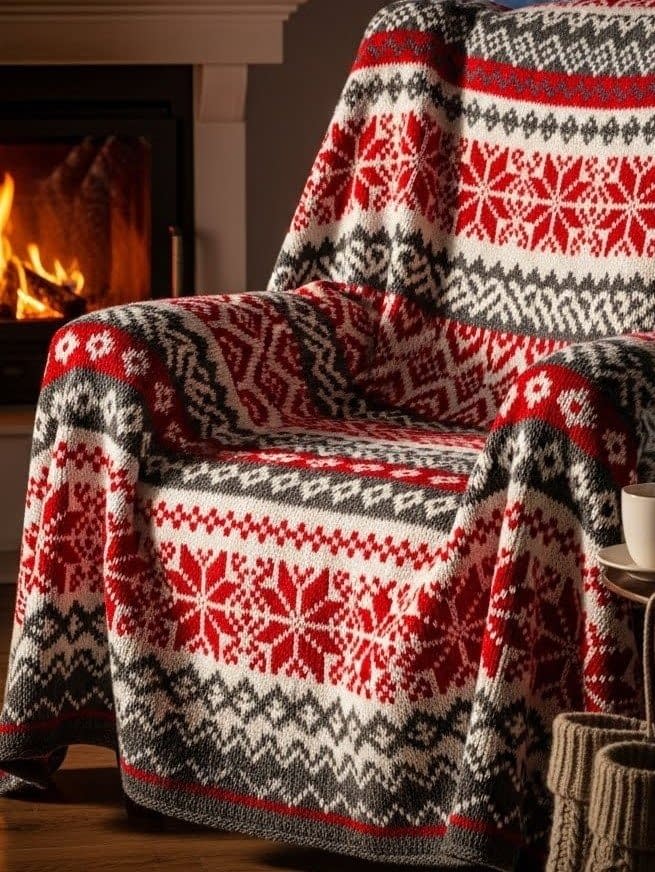
A Nordic-style knitted blanket is a timeless winter décor piece. The prompt describes this blanket draped over an armchair near a glowing fireplace, with red, white, and charcoal geometric motifs that shine under warm firelight. This pattern offers a larger and more advanced project, though patient beginners can still complete it by taking their time with colorwork.
Skill Level
Intermediate (colorwork + large-scale project)
Finished Size
Approximately 50 inches by 60 inches, depending on the number of motif repeats.
Materials
• Worsted weight yarn in three colors: red, white, and charcoal
• Circular knitting needles, size 5 mm (used flat)
• Yarn needle
• Scissors
Notes
Nordic designs traditionally use stranded colorwork, which involves carrying two colors across the row. This blanket is knitted flat in panels, which are later sewn together. This approach reduces the difficulty of managing long rows of colorwork.
Instructions
Step 1: Choosing the Motif
Nordic motifs typically include diamonds, snowflakes, chevrons, and small geometric repeats. Select two to three motifs that you will alternate throughout the blanket to stay true to the classic Scandinavian style.
Step 2: Knitting the First Panel
Cast on approximately 60 stitches using the charcoal yarn. Work six rows in garter stitch to create a stable border.
Transition into the first colorwork motif by working stockinette stitch while alternating red and white according to your chosen chart. As you follow the colorwork pattern:
• Keep floats loose behind the work to maintain elasticity.
• Do not pull the strands too tightly, or the panel may pucker.
Continue the colorwork until the panel reaches the full height you want, usually about 60 inches.
Finish the panel with six more rows of garter stitch in charcoal.
Bind off.
Step 3: Creating Additional Panels
Repeat this process two or three more times, switching the motif order or background color for visual interest. Each panel should match the others in height.
Step 4: Sewing the Blanket Together
Place the panels side by side with the right sides facing upward. Seam the panels using a mattress stitch, ensuring the motifs align properly.
Step 5: Optional Border
Once the blanket is assembled, you may add a border:
• Pick up stitches along all edges.
• Knit six to eight rows in garter stitch.
• Bind off loosely.
Variations
• Use a single motif for a minimalist look.
• Add tassels to each corner.
• Create a reversible version by lining the back with soft fleece.
This Nordic blanket is a meaningful, long-lasting handmade gift filled with warmth and tradition.
Knitted Christmas Stockings
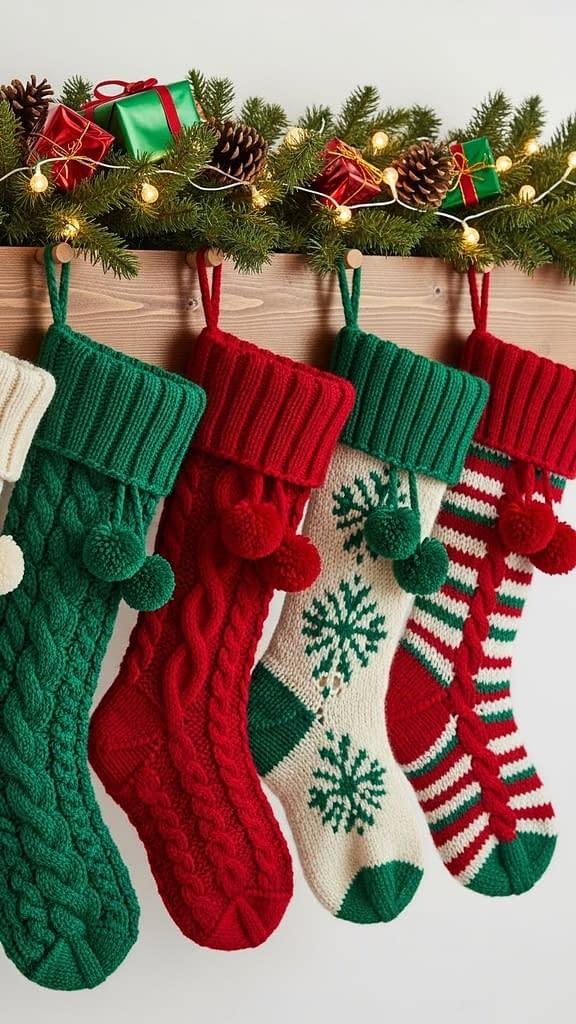
The knitted Christmas stockings described in the prompt hang from a wooden mantel, decorated with classic red, green, and cream colors, cable details, snowflake patterns, and small pom-poms under soft string lights. This pattern creates a traditional holiday stocking that is heirloom-quality yet achievable for beginners ready for a gentle challenge.
Skill Level
Intermediate (shaping + simple colorwork + cables)
Finished Size
Approximately 18 inches tall from top to toe and 6 to 7 inches wide.
Materials
• Worsted weight yarn in red, green, and cream
• Circular knitting needles, size 5 mm
• Yarn needle
• Scissors
• Optional small pom-pom maker
Notes
This stocking is knitted flat to make it accessible for beginners who are not yet comfortable knitting in the round. The stocking is shaped using simple increases and decreases, then sewn together.
Instructions
Step 1: Creating the Cuffed Top
Cast on 56 stitches using cream yarn. Work in knit one, purl one ribbing for approximately 18 rows to form a thick, folded cuff.
Step 2: Beginning the Leg
Switch to red yarn. Work in stockinette stitch for six rows to form a base for the colorwork.
Add a snowflake motif using red and cream yarn. You may choose a simple eight-point snowflake chart or another winter-themed design.
Continue the leg until it measures approximately 10 to 12 inches.
Step 3: Adding Cable Details
Switch to green yarn and create a six-stitch cable panel centered on the stocking. Work cable rows every sixth row for visual interest.
Continue until the total leg length is complete.
Step 4: Shaping the Heel
Using cream yarn:
• Work half the stitches for several rows in stockinette stitch.
• Reduce stitches gradually to form a curved heel.
• Rebuild the stitch count by increasing back to the original number.
This creates a classic turned heel shape.
Step 5: Shaping the Foot
Work the full row of stitches again in stockinette stitch for about five inches, switching colors to create festive stripes if desired.
Step 6: Forming the Toe
Decrease one stitch at each side every second row until you have approximately twelve stitches remaining.
Bind off and close the toe neatly using a yarn needle.
Step 7: Sewing the Stocking
Fold the stocking in half with right sides facing and sew from the cuff down to the toe, ensuring the seam is smooth and secure.
Step 8: Adding Decorations
Attach pom-poms, tassels, or knitted berries. You may also embroider small snowflakes or stars onto the stocking.
Variations
• Make a matching set in different color combinations.
• Personalize with embroidered names at the cuff.
• Add small pockets to hide tiny gifts.
This knitted Christmas stocking is a festive, meaningful, and highly cherished handmade holiday gift.
Handmade Knitted Headband Ear Warmer
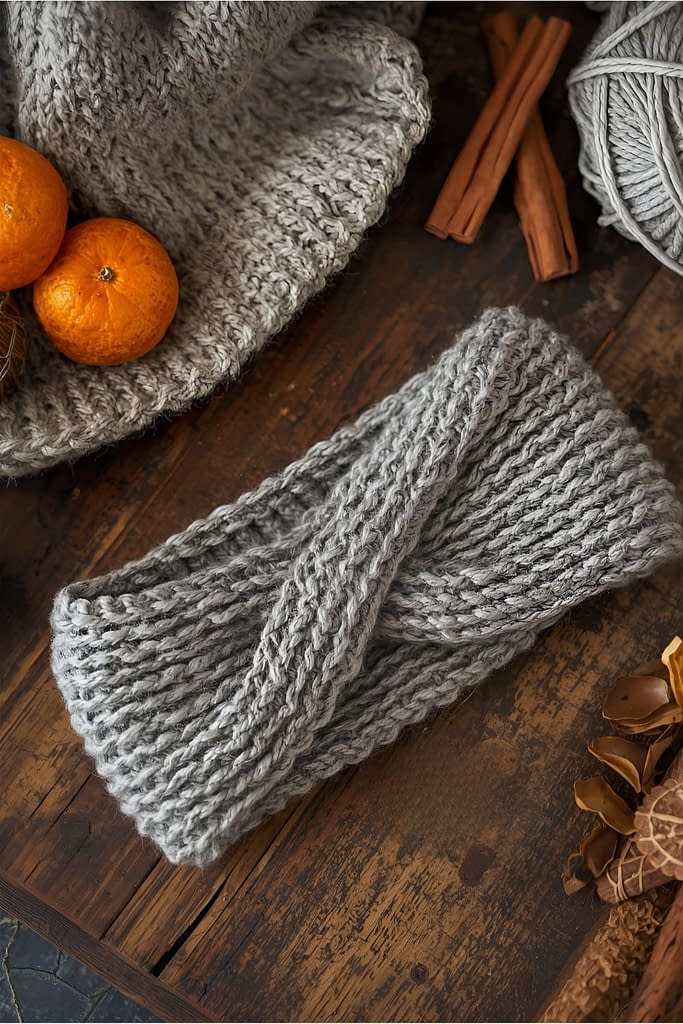
A knitted ear warmer headband is one of the most practical winter gifts you can make. It is quick to knit, yet looks elegant and thoughtful, making it a wonderful option for holiday gifting. This design is inspired by the prompt you provided: a soft gray wool headband with a cozy twist detail, photographed on a rustic wooden table with warm winter accents. This pattern captures that same handmade charm and texture, making it ideal for both beginners and advanced knitters who want a relaxing and satisfying project.
Skill Level
Beginner to intermediate (basic knitting knowledge + a simple twist technique)
Finished Size
Approximately 4 inches wide and sized for an average adult head circumference of 21 to 23 inches. The size can be adjusted by modifying length before seaming.
Materials
Soft wool or wool blend yarn in a medium or worsted weight
Knitting needles: 5.0 millimeters
Yarn needle for seaming
Scissors
Stitch markers (optional)
Notes
The headband is knitted as a long rectangle, and the twist is created during assembly by folding in a specific way before seaming. The headband uses a textured stitch pattern that adds depth and visual interest similar to the realistic, soft wool texture in the prompt.
Instructions
Creating the Headband Panel
- Begin by casting on twenty-four stitches using a long-tail cast on or any stretchy cast on method of your choice.
- Work in a textured ribbing pattern. This pattern may be created by knitting two stitches and then purling two stitches across the row.
- Continue the pattern by knitting the knit stitches and purling the purl stitches on every row. This creates a stretchy rib texture that lies flat when wrapped around the head.
- Continue knitting until the rectangular panel measures approximately nineteen inches long. For a larger size, continue knitting until you reach twenty-one inches.
- Once the desired length is achieved, bind off all stitches loosely to maintain elasticity.
Creating the Twist and Seaming
- Lay the rectangular panel flat on a table.
- Bring the two shorter ends toward each other.
- Instead of aligning them evenly, create a twist by folding one end in half horizontally and doing the same with the other end.
- Nest the two folded ends inside each other. This creates the classic twist knot effect.
- Using your yarn needle and a long tail of yarn, seam all four layers together securely.
- Turn the headband inside out so the seam is hidden and the twist looks smooth and intentional.
Variations
To add detail, you can alternate sections of knit stitches and purl stitches to create pronounced texture. You may also adjust the width by casting on more or fewer stitches. Adding a decorative button or a contrasting stripe is another way to personalize this handmade winter ear warmer.
Knitted Animal Plush Toy
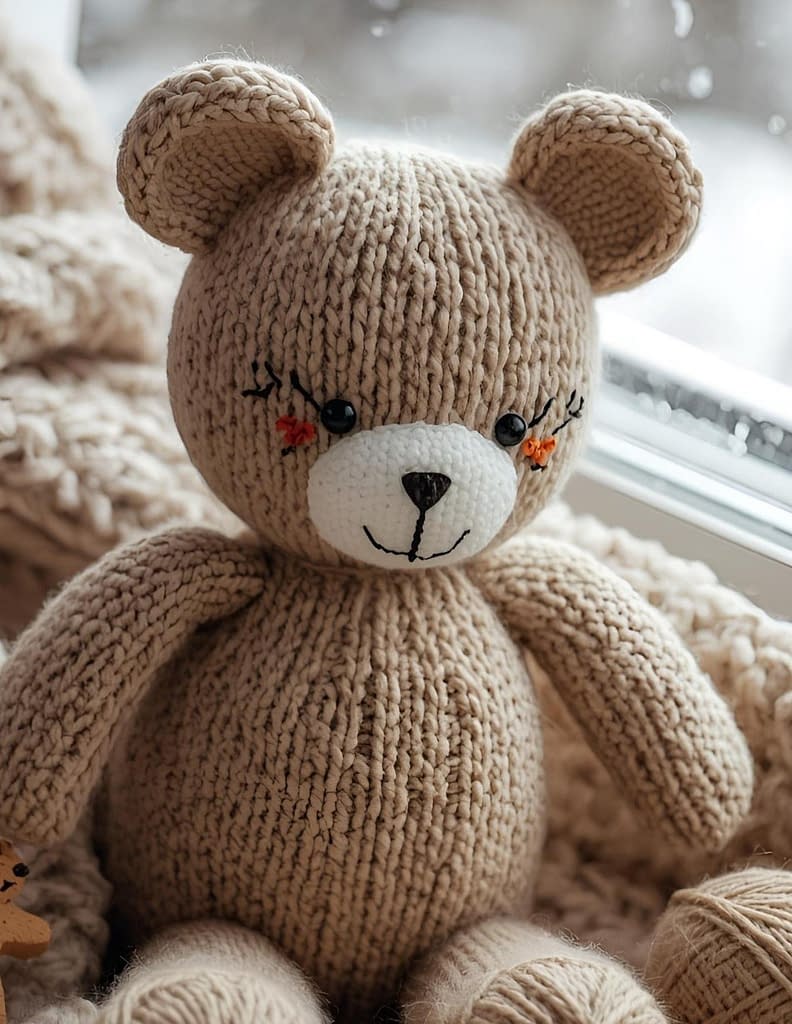
Knitted plush toys make heartwarming gifts, especially during winter. The prompt describes a soft knitted bear or bunny made from tan yarn, sitting on a wool blanket near a snowy window. This pattern is created to reflect that same charm. It is very beginner friendly and focuses primarily on simple shaping, basic stitching, and assembly.
Skill Level
Beginner (basic shaping + seaming)
Finished Size
Approximately 8 to 10 inches tall depending on yarn and tension.
Materials
Soft wool or wool blend yarn in tan or cream
Knitting needles: 4.0 millimeters
Small amount of black or dark brown yarn for facial embroidery
Fiberfill stuffing
Yarn needle
Scissors
Stitch markers
Notes
This plush toy is worked in flat pieces and then sewn together. It uses very basic shapes which makes it ideal for beginners.
Instructions
Creating the Body
- Cast on twenty stitches.
- Work in stockinette stitch, knitting the first row and purling the next row, repeating this sequence until the piece measures about five inches tall.
- Increase one stitch at each end of the next two rows to slightly widen the body.
- Continue in stockinette stitch until the piece measures eight inches in length.
- Bind off all stitches and set aside.
Creating the Head
- Cast on eighteen stitches.
- Work in stockinette stitch until the piece measures four inches tall.
- To shape the top, decrease one stitch at the beginning and end of every other row for six rows.
- Bind off leaving a long tail for sewing.
Creating the Ears
- Cast on eight stitches.
- Work in stockinette stitch for two inches.
- Begin shaping by decreasing one stitch at the beginning of the next two rows.
- Bind off and repeat for the second ear.
Creating the Arms and Legs
- Cast on ten stitches for each limb.
- Work in stockinette stitch for three inches.
- Bind off leaving a tail for sewing.
- Repeat to create four separate limbs.
Assembly
- Sew the sides of the body piece together, leaving the top open for stuffing.
- Fill the body evenly with fiberfill, ensuring it retains a soft, rounded shape.
- Sew the head piece together, stuff it gently, and stitch it securely onto the body.
- Position the ears at the top of the head and sew them on firmly.
- Attach the limbs by sewing them to the sides of the body.
- Embroider facial features using dark yarn. You may create simple eyes and a small nose to give the toy a gentle expression.
Variations
You can shape the ears differently to make a bear, bunny, or cat. You can also use stripes, add a scarf, or knit a tiny sweater to enhance the winter theme.
Knitted Winter Decorative Garland
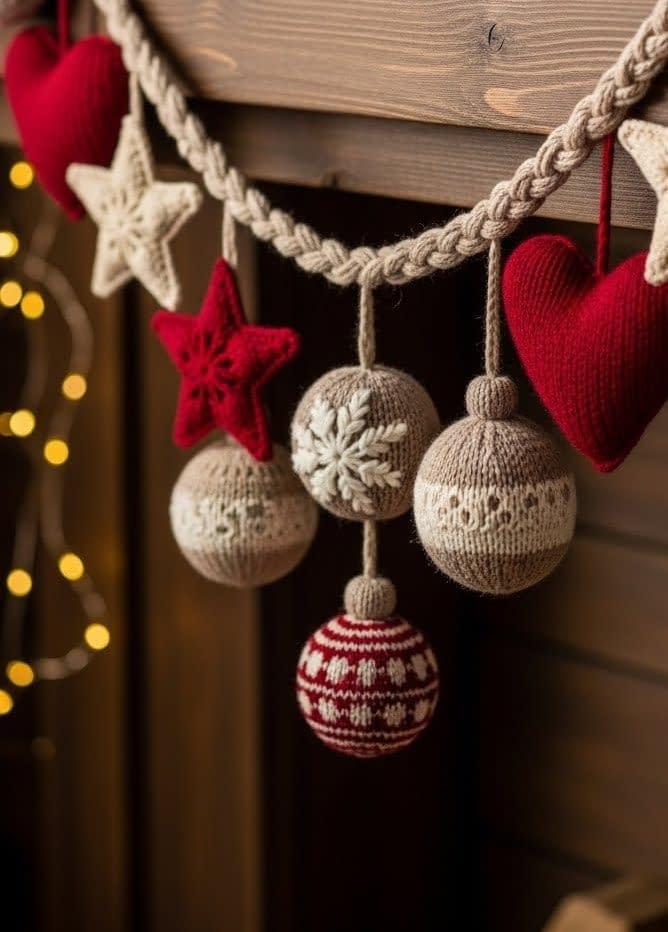
This decorative knitted garland mirrors the prompt’s beautiful display of hand-knit stars, snowflakes, hearts, and baubles in deep red, cream, and beige tones. It is soft, dimensional, and visually stunning, making it a perfect winter decoration or handmade holiday gift.
Skill Level
Beginner to intermediate (simple shaping + assembly)
Finished Size
Garland length is customizable; decorative shapes usually measure 2 to 4 inches across.
Materials
Medium weight yarn in red, cream, and beige
Knitting needles: 4.0 millimeters
Stuffing for lightly filling shapes
Yarn needle
Scissors
Braided wool cord or yarn for stringing pieces together
Optional: tiny lights for decoration
Notes
Each shape is knitted individually, lightly stuffed, and then attached to the main cord.
Instructions
Creating the Knitted Stars
- Cast on five stitches.
- Work in stockinette stitch for five rows.
- Increase at both ends of the next row.
- Continue increasing until the piece forms a triangular point.
- Create five identical triangles.
- Sew the sides of each triangle to one another to form a star.
- Add a small amount of stuffing before closing.
Creating the Hearts
- Cast on twelve stitches.
- Work in stockinette stitch for six rows.
- Divide the stitches in half and work each half separately to form the curves of the heart.
- Shape each half by gradually decreasing until they form rounded tops.
- Sew the pieces together, stuff lightly, and close the seam.
Creating the Snowflakes
Snowflakes can be knitted using pointed triangular pieces similar to the star pattern, but with slimmer shaping to create more delicate points. Assemble six thin points around a circular center piece.
Creating the Baubles
- Cast on six stitches.
- Increase each row until you reach twelve stitches.
- Work in stockinette stitch for four rows.
- Decrease until six stitches remain.
- Sew together and add a small amount of stuffing.
Assembling the Garland
- Cut or braid a long cord using matching colors.
- Arrange the knitted shapes evenly along the cord.
- Sew each piece securely so that the garland hangs evenly.
- Add a loop on each end for hanging.
- Optionally, attach tiny warm lights to enhance the winter ambiance.
Variations
You may alternate color patterns, create larger shapes for a statement garland, or add additional motifs such as knitted bells, trees, or mittens.
Conclusion
Winter is a season filled with warmth, creativity, and the joy of making something meaningful by hand. This collection of knitting patterns celebrates that spirit through ten cozy, thoughtful, and highly giftable projects inspired directly by the detailed prompts you provided. Each project reflects the charm of winter textures, gentle lighting, and rich wool fibers, whether you are crafting a Nordic-style blanket, soft mittens, or a whimsical plush toy.
This guide was designed not just to inspire, but to educate through clear, detailed, step-by-step instructions that even beginners can follow with confidence. From structured beanies to decorative garlands, every handmade piece carries intention and personal touch, transforming simple yarn into heartfelt winter gifts. As you explore these patterns, you will build skills, create memories, and share warmth with friends and family through each handcrafted item.
These cozy winter knitting patterns offer endless possibilities for personalization, creativity, and expression. Whether you make one or all ten, each pattern is designed to bring joy, comfort, and a beautifully handmade touch to the winter season.


